- Change power settings
launch the Control Panel app, then select Hardware and Sound > Power Options. You’ll typically see two options: “Balanced (recommended)” and “Power saver.”
To see the “High performance” setting, click the down arrow by “Show additional plans.”
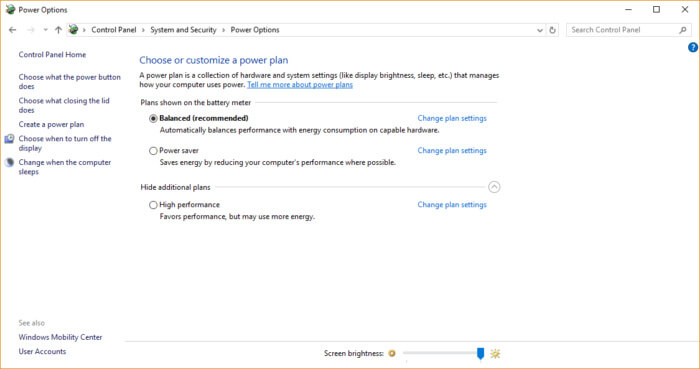
To change your power setting, simply choose the one you want, then exit Control Panel. “High performance” gives you the most oomph, but uses the most power; “Balanced” finds a happy medium between power use and better performance; and “Power saver” does everything it can to give you as much battery life as possible.
Desktop users have no reason to choose “Power saver,” and even laptop users should consider the “Balanced” option when unplugged — and “High performance” when connected to a power source.
2. Disable programs run on startup
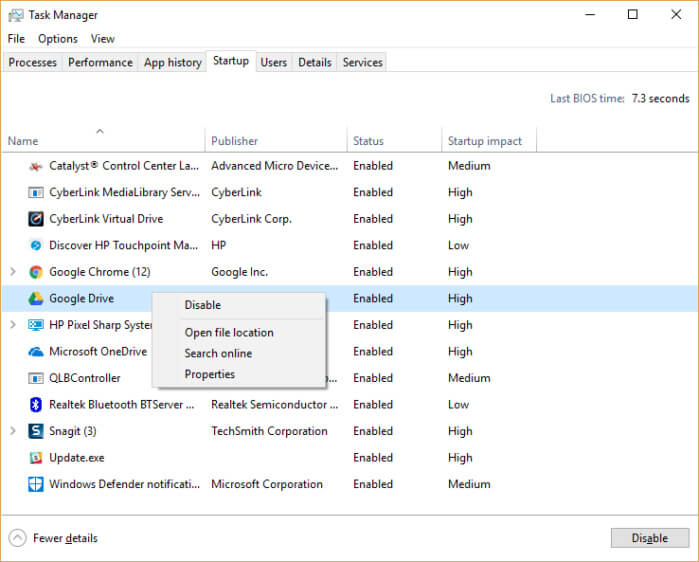
Launching the Task Manager: Press Ctrl-Shift-Esc, right-click the lower-right corner of your screen and select Task Manager. If the Task Manager launches as a compact app with no tabs, click “More details” at the bottom of your screen. The Task Manager will then appear in all of its full-tabbed glory.
Click the Startup tab. You’ll see a list of the programs and services that launch when you start Windows. Included on the list is each program’s name as well as its publisher, whether it’s enabled to run on startup, and its Startup impact.To stop a program or service from launching at startup, right-click it and select “Disable.”
3. Shut off Windows tips and tricks
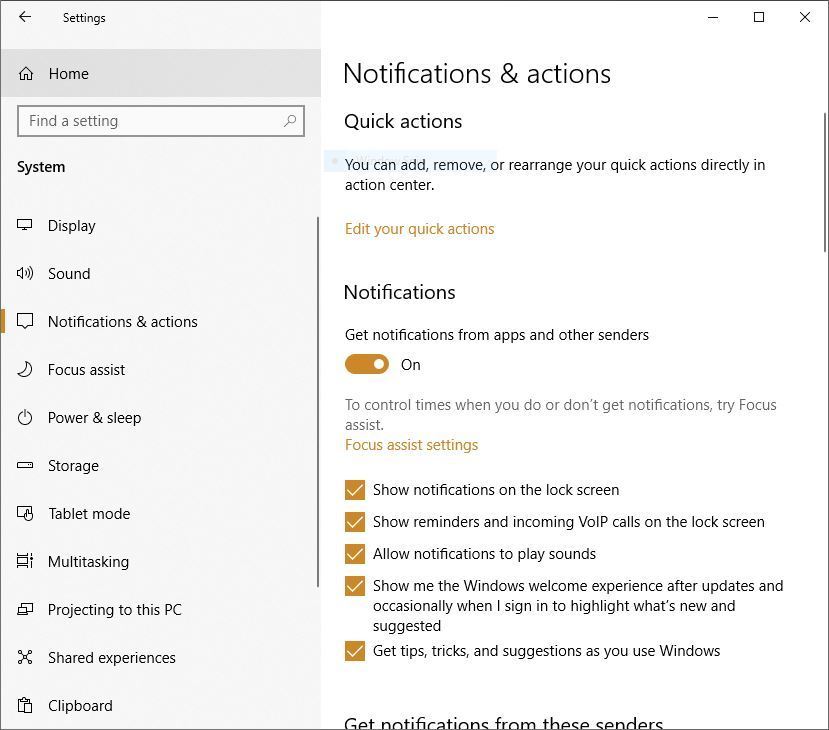
To do so, click the Start button, select the Settings icon and then go to System > Notifications & actions. Scroll down to the Notifications section and unchecked the box marked “Get tips, tricks, and suggestions as you use Windows.”
4. Clean out your hard disk
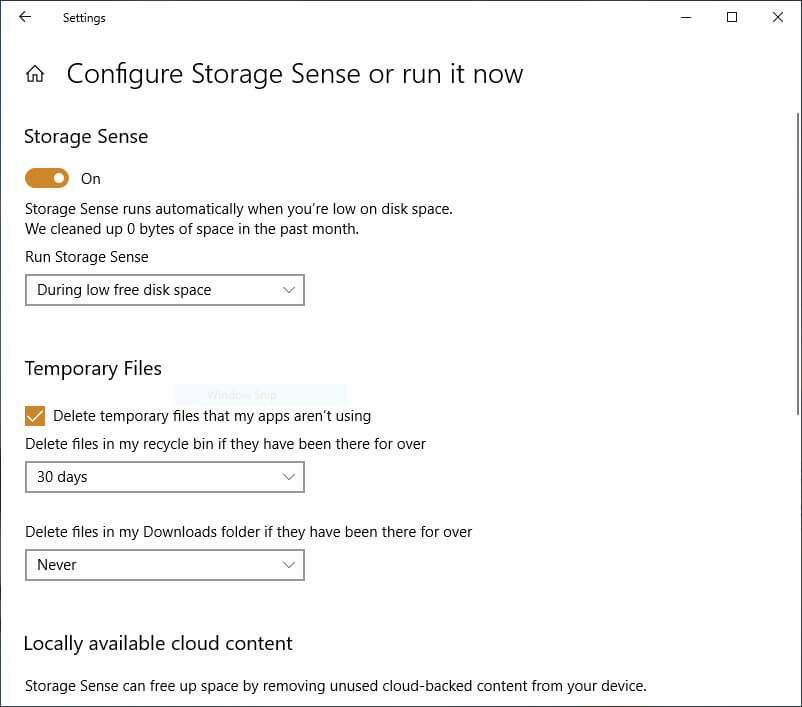
Cleaning it out can give you a speed boost. Windows 10 has a surprisingly useful built-in tool for doing this called Storage Sense. Go to Settings > System > Storage and at the top of the screen, move the toggle from Off to On. When you do this, Windows constantly monitors your PC and deletes old junk files.
You can customize how Storage Sense works and also use it to free up even more space than it normally would. Underneath Storage Sense, click “Configure Storage Sense or run it now.”
5. Clean out Registry
To do your own Registry backup, type regedit.ext in the search box, then press Enter. That runs the Registry editor. From the File menu, select Export. From the screen that appears, make sure to choose the “All” option in the Export range section at the bottom of the screen. Then choose a file location and file name and click Save. To restore the Registry, open the Registry editor, select Import from the File menu, then open the file you saved.
Now download, install and run Auslogics Registry Cleaner. On the left-hand side of the screen you can select the kinds of Registry issues you want to clean up — for example, File Associations, Internet or Fonts. I generally select them all.
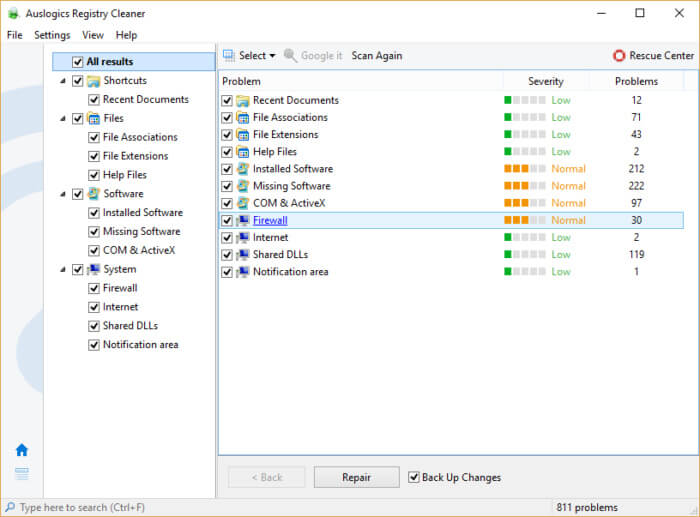
It now scans your Registry for errors, then shows you what it found. It ranks the errors according to their severity to help you decide which to fix. Click Repair when you’ve made your decision, and make sure that “Back Up Changes” is checked, so you can restore the Registry easily if something goes wrong.
6. Stop OneDrive from syncing
Microsoft’s cloud-based OneDrive file storage, built into Windows 10, keeps files synced and up to date on all of your PCs. It’s also a useful backup tool so that if your PC or its hard disk dies, you still have all your files intact, waiting for you to restore them.
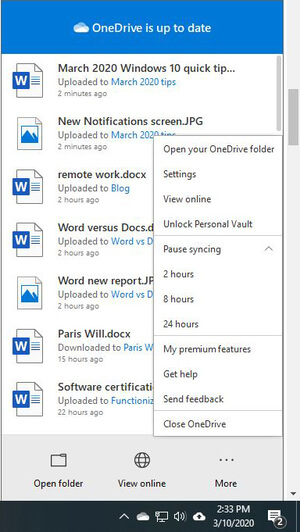
To do so, right-click the One Drive icon (it looks like a cloud) in the notification area on the right side of the taskbar, then click the More button at the bottom of the screen. From the popup screen that appears, click “Pause syncing” and select either 2 hours, 8 hours or 24 hours, depending upon how long you want it paused. During that time, gauge whether you’re seeing a noticeable speed boost.
If so, and you decide you do indeed want to turn off syncing, right-click the OneDrive icon, and from the popup, select Settings > Account. Click “Unlink this PC,” and then from the screen that appears, click “Unlink account.” When you do that, you’ll still be able to save your files to your local OneDrive folder, but it won’t sync with the cloud.
7. Turn off search indexing
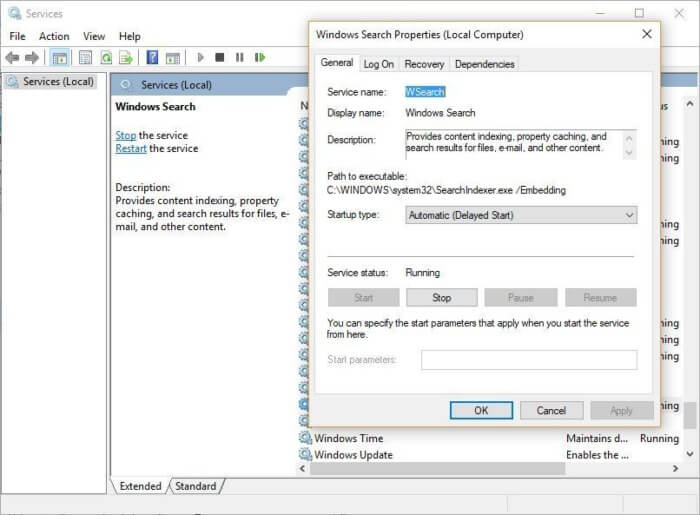
To get the maximum benefit in Windows 10, you need to turn indexing off completely. To do so, type services.msc in the Windows 10 search box and press Enter. The Services app appears. Scroll down to either Indexing Service or Windows Search in the list of services.
Double-click it, and from the screen that appears, click Stop. Then reboot your machine. Your searches may be slightly slower, although you may not notice the difference. But you should get an overall performance boost.
If you’d like, you can turn off indexing only for files in certain locations. To do this, type index in the Windows 10 search box and click the Indexing Options result that appears. The Indexing Options page of the Control Panel appears. Click the Modify button, and you’ll see a list of locations that are being indexed, such as Microsoft Outlook, your personal files, and so on. Uncheck the box next to any location, and it will no longer be indexed.
8. Turn on automated Windows maintenance
Windows 10 performs maintenance on your PC. It does things like security scanning and performing system diagnostics to make sure everything is up to snuff.
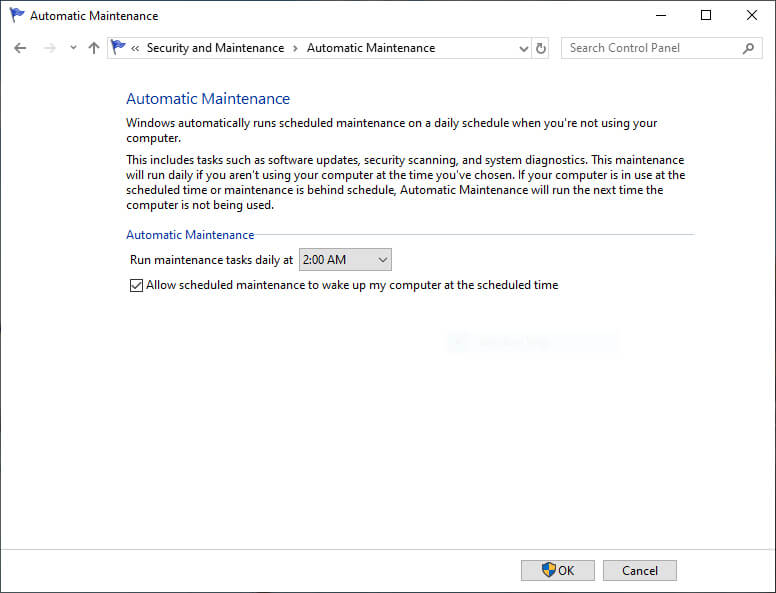
Run the Control Panel app and select System and Security > Security and Maintenance. In the Maintenance section, under Automatic Maintenance, click “Start maintenance” if you want it to run now.
To make sure that it runs every day, click “Change maintenance settings,” and from the screen that appears, select the time you’d like maintenance to run, and check the box next to “Allow scheduled maintenance to wake up my computer at the scheduled time.” Then click OK.
9. Disable transparency
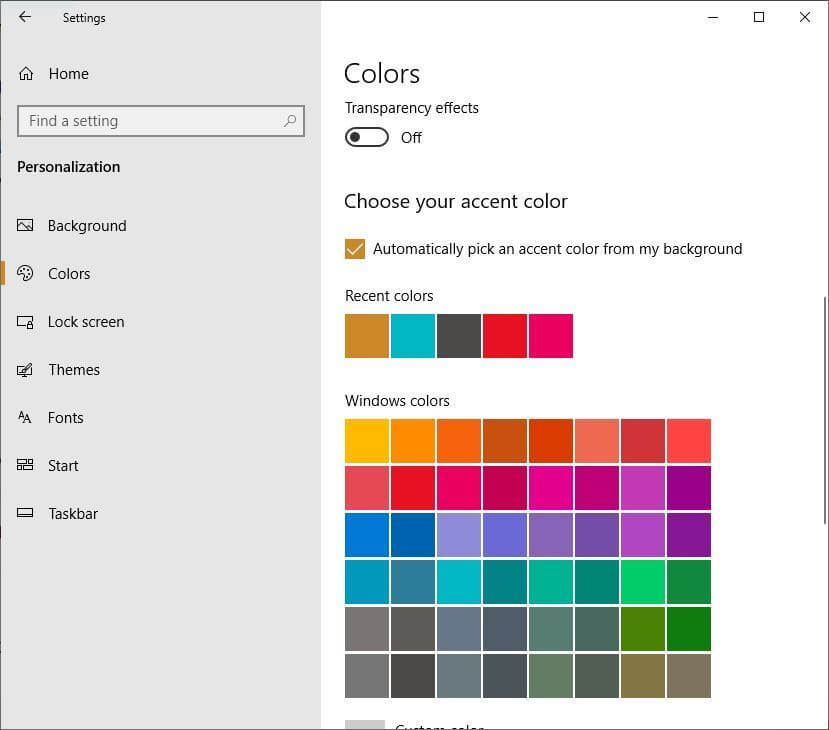
It takes a surprising amount of work for Windows to create these transparency effects, and turning them off can make a difference in system performance.
To do it, from Settings, choose Personalization > Colors, scroll down to “Transparency effects” and move the slider to Off.
10. Disable shadows, animations and visual effects
It’s easy to turn them off. In the Windows 10 search box, type sysdm.cpl and press Enter. That launches the System Properties dialog box. Click the Advanced tab and click Settings in the Performance section. That brings you to the Performance Options dialog box. You’ll see a varied list of animations and special effects.
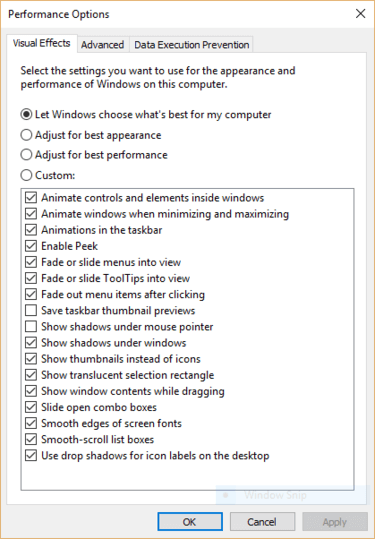
If you have time on your hands and love to tweak, you can turn individual options on and off. These are the animations and special effects you’ll probably want to turn off, because they have the greatest effect on system performance:
- Animate controls and elements inside windows
- Animate windows when minimizing and maximizing
- Animations in the taskbar
- Fade or slide menus into view
- Fade or slide ToolTips into view
- Fade out menu items after clicking
- Show shadows under windows
However, it’s probably a lot easier to just select “Adjust for best performance” at the top of the screen and then click OK. Windows 10 will then turn off the effects that slow down your system.


